Open the image you want to add a smoke effect to in Adobe Photoshop CC.
Create a new layer by going to Layer > New > Layer or using the keyboard shortcut Ctrl + Shift + N.
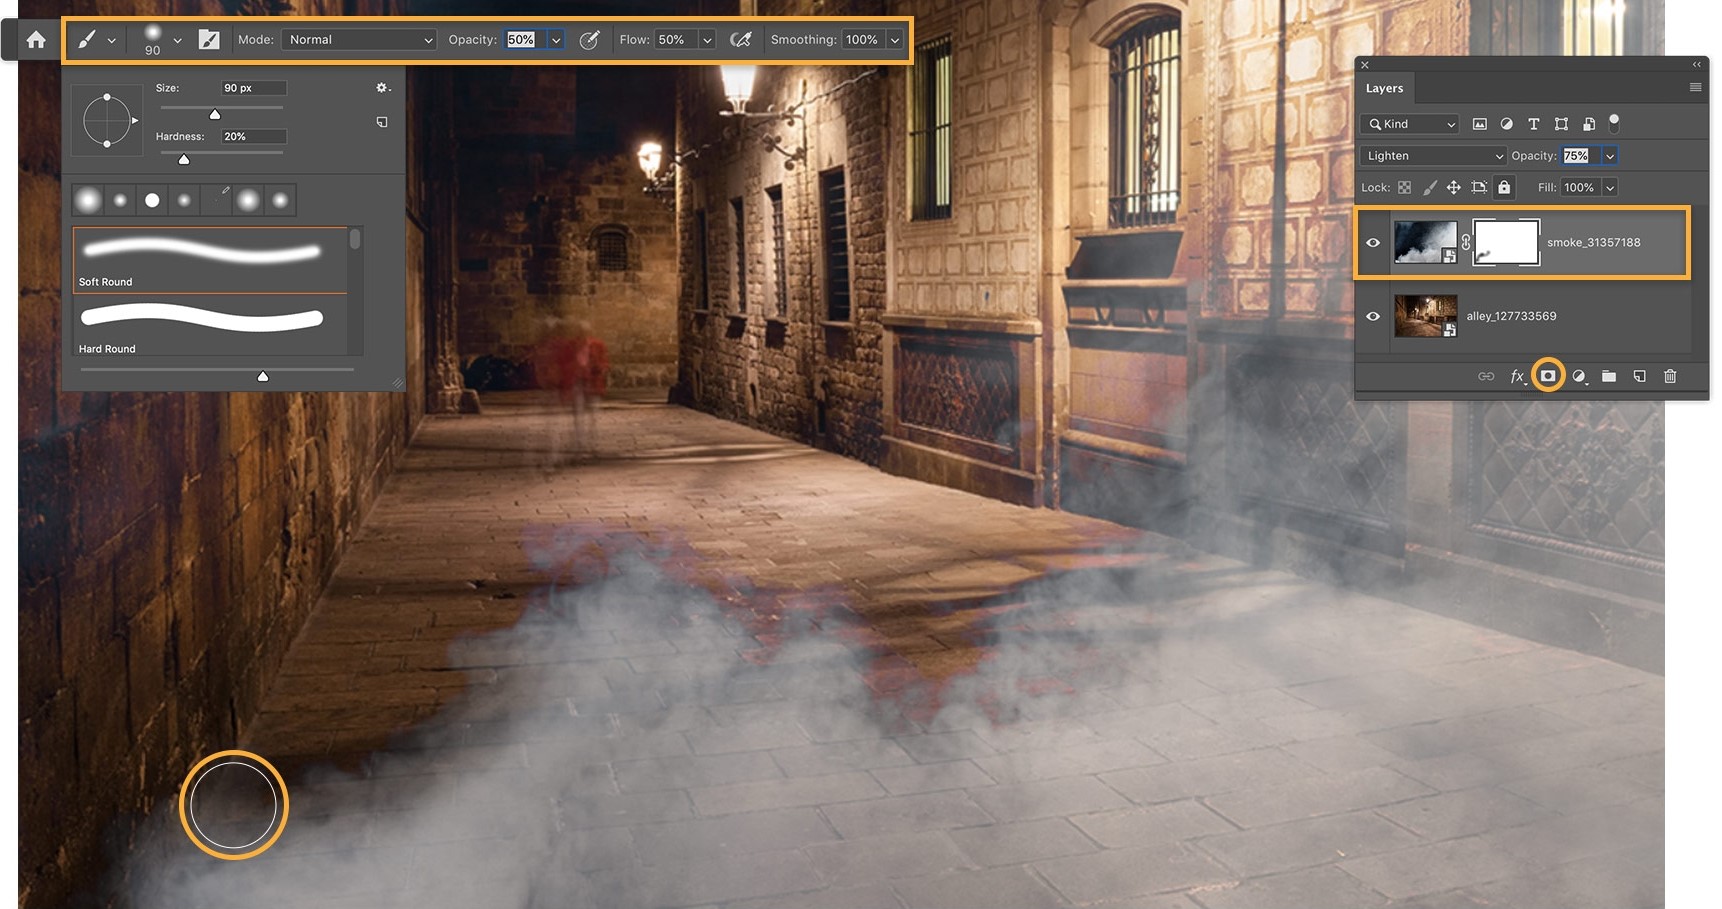
Select the Brush tool from the toolbar and choose a soft-edged brush.
Change the brush color to black and paint over the area where you want the smoke to appear. This will hide the underlying image in that area.
Go to Layer > Layer Mask > Reveal All. This will add a white layer mask to the new layer, revealing the underlying image.
Select the layer mask by clicking its thumbnail in the Layers panel.
Change the brush color to white and paint over the areas of the smoke effect to make them more visible. You can use different brush sizes, densities, and opacity to create a more realistic smoke effect.
If you want to add more depth to the smoke effect, you can use the “Filter > Render > Clouds” and then apply a motion blur filter to it. You can also use Filter > Artistic > Smudge Stick or Filter > Artistic > Dry Brush to create more texture on the smoke.
Once you are happy with the smoke effect, you can merge the layers by going to Layer > Merge Layers or using the keyboard shortcut Ctrl + E.
Finally, you can use the Dodge and Burn tools to improve the contrast of the smoke effect and make it more realistic.

In summary, to use the layer mask in Adobe Photoshop CC to create a smoke effect on an image, you must:
Open the image in Adobe Photoshop CC
Create a new layer
Use the Brush tool to paint the area where you want the smoke to appear using the black color
Add a layer mask using Layer > Layer Mask > Reveal All
Use the brush tool to paint the areas of the smoke effect using white color
Adjust the smoke effect using filter options and dodge and burn tools
Merge the layers and save the image.